Creating and importing a map for Phaser using Tiled
Phaser is an HTML5 game engine that comes with a lot of cool features that I’ve yet to figure out. Here, I’ll give you a walk through of designing a map utilizing a tool called Tiled and then bringing that map into your phaser project.
Create the Phaser Game object
I first set up some basic project scaffolding within phaser, such as setting up the phaser game object, which will actually represent the game within our browser.
var Game = function() {

    this._width = window.innerWidth;
    this._height = window.innerHeight;

    this.game = new Phaser.Game(this._width, this._height, Phaser.AUTO, '', {
        preload: this.preload,
        create: this.create,
        update: this.update
    });
}

Game.prototype = {
    preload: function() {

    },
    create: function() {

    },
    update: function() {

    }
}

new Game();
If you’re not familiar with phaser, what the above code will effectively do is set up a phaser game object with a width and height of the user’s viewable screen and wire up the event handlers that will be called when phaser calls it’s preload, create, and update events. We simply using the overload of the phaser Game class that takes 5 parameters.
Create your tilemap using Tiled
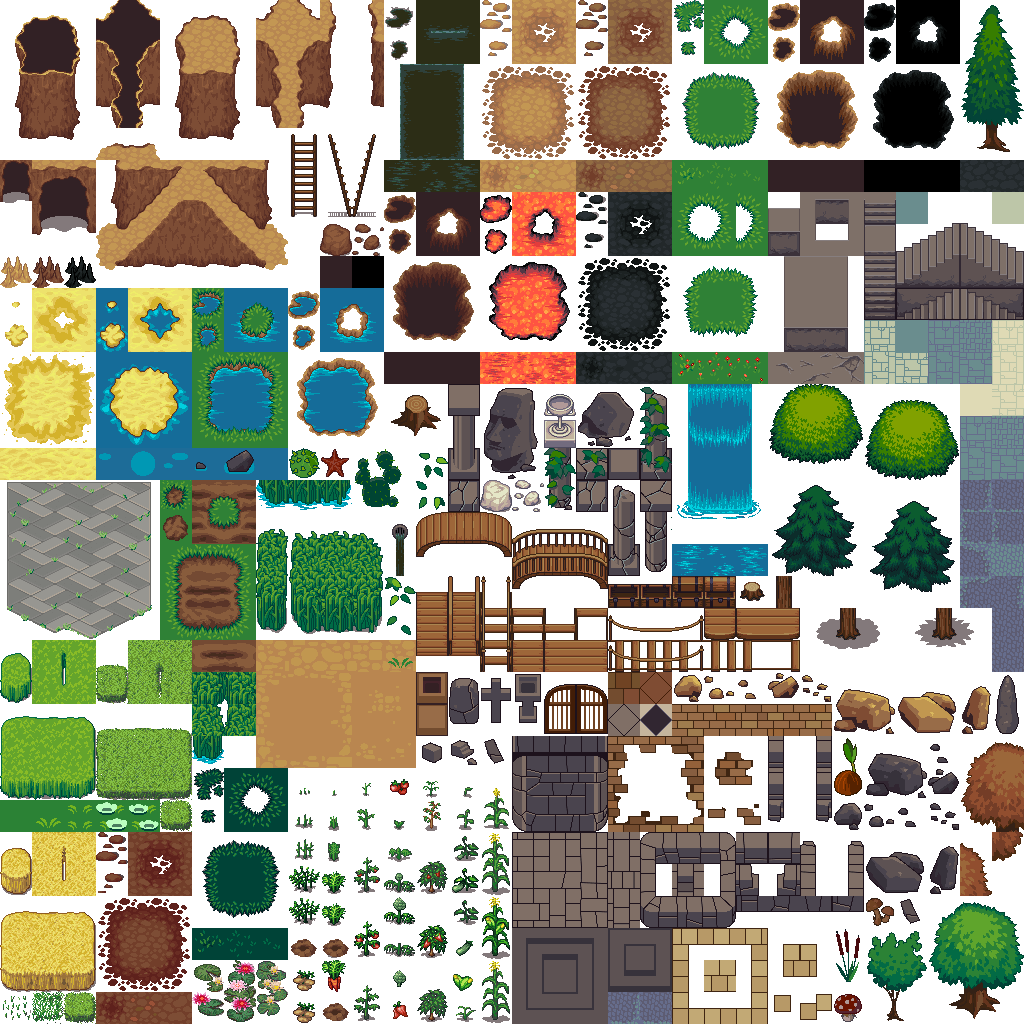
There is a great tool called Tiled Map Editor, which will allow you to create orthogonal, isometric, and staggered maps. I’ll be demonstrating the basics of using this tool using some free graphics from Open Game Art. Save the following sprite sheet and download the map editor specified above.
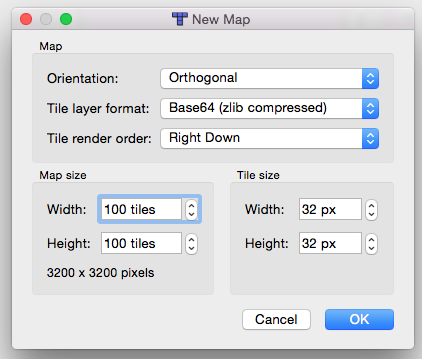
After downloading and installing Tiled, open it up. At first, the UI can seem a little overwhelming if you don’t know what you’re looking at. We’ll start by first creating a new map by pressing the New icon in the upper left hand corner. We’ll use the default settings, which specify that our map should have an Orthogonal orientation, should be 100 tiles wide by 100 tiles long, and that our tile size will be 32x32 pixels.
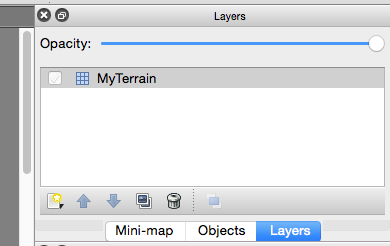
You should now notice on the right hand side of the screen, under the pane titled Layers that there is an entry named Tile Layer 1. Go ahead and rename this layer to MyTerrain.
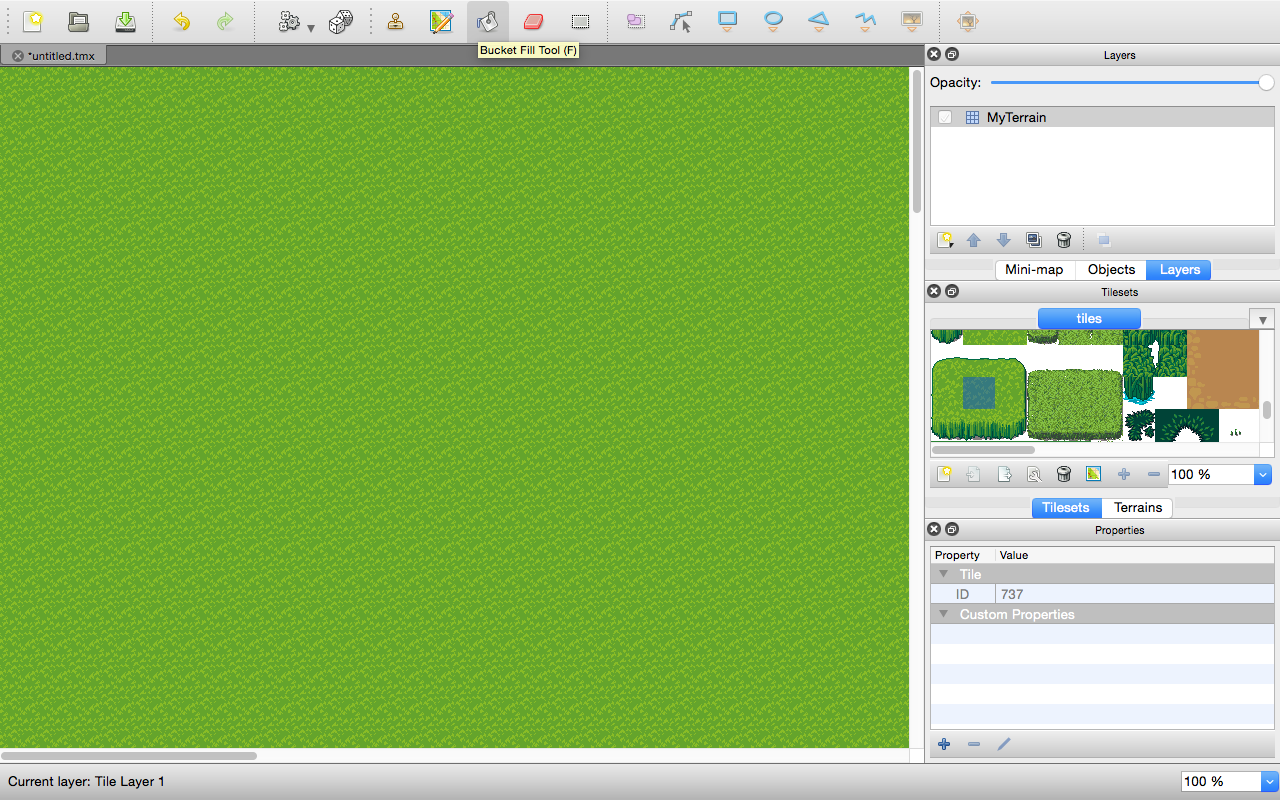
Now that we have a layer to draw on, lets import the spritesheet that we saved earlier into our map editor. To do this, click the New Tileset icon in the Tilesets pane. Provide a name for your new tiletset and browse for the image containing our terrain graphics.

Upon creating our new tileset, you should see your image loaded into the tileset pane, where you can select one or more tiles to paint with. Select a grass tile from the tileset pane and use the fill tool to fill the entire map.
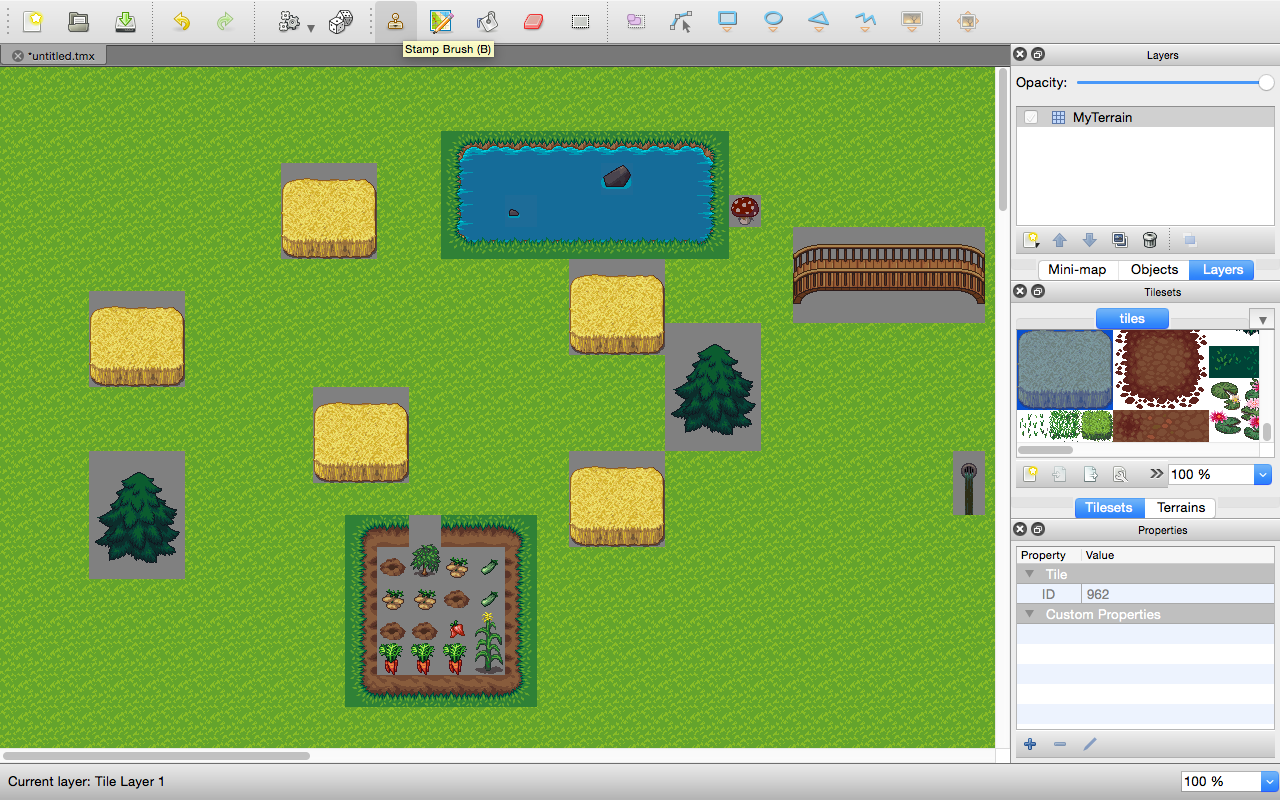
Use the stamp brush at the top, along with the tiles in our tilemap to create your map on the created layer. Feel free to create additional layers to draw on. Each layer has it’s own properties, which are changeable in the bottom pane.
Next, we need to export the map. Go to File > Export As > and save the file as type json. For the sake of the tutorial, I’ll be naming this file firstMap. Doing this will produce a firstMap.json file that will provide phaser with the information necessary to take a single image and piece it together by individual 32x32px tiles.
Importing the map into Phaser
Lets review what we’ve done so far. First we created the basic foundation for our phaser project by using phaser’s Game class. We wired up the event handlers that will take care of the preload, create, and update events, however we’ve yet to fill in our logic for these methods. We’ve used the Tiled Map Editor to create a basic map for phaser and we have exported that tilemap as a json file that is ready to be consumed by phaser.
Lets start by telling phaser to load our image and tilemap resources when it starts. To do so, add the following code (lines 2 and 3) to the preload method that we created earlier. Change the paths that I have provided to the paths where your json and png files reside.
preload: function() {
        this.game.load.tilemap('MyTilemap', '/images/maps/firstMap.json', null, Phaser.Tilemap.TILED_JSON);
        this.game.load.image('tiles', '/images/terrain_atlas.png');
}
What this will first do is tell the game object to load the tilemap firstMap.json and give it an alias as MyTilemap, which we’ll be able to refer to it later with.
Secondly, we tell the game object to load the image that we used to create our map, terrain_atlas.png. If you’ll recall, tiles is the name that we provided to the map editor when creating our tileset, as it’s important that the first parameter of this call matches the name of the tileset that you created. Loading these objects up front, in our preload function, will cache them for when we need to access them later.
Next, we’ll set up the create method to create the map.
create: function() {
        // Load the map.
        map = this.game.add.tilemap('MyTilemap');
        map.addTilesetImage('tiles', 'tiles');

        layer = map.createLayer('MyTerrain');
        layer.resizeWorld();
        layer.wrap = true;

        this.cursors = this.game.input.keyboard.createCursorKeys();
    }
Finally, we’ll add some logic in our update method to handle the keyboard input that we added above in our create method. This will allow us to use the arrows keys to move within the map from the browser.
update: function() {
        if (this.cursors.left.isDown) {
            this.game.camera.x -= 8;
        } else if (this.cursors.right.isDown) {
            this.game.camera.x += 8;
        }

        if (this.cursors.up.isDown) {
            this.game.camera.y -= 8;
        } else if (this.cursors.down.isDown) {
            this.game.camera.y += 8;
        }
    }
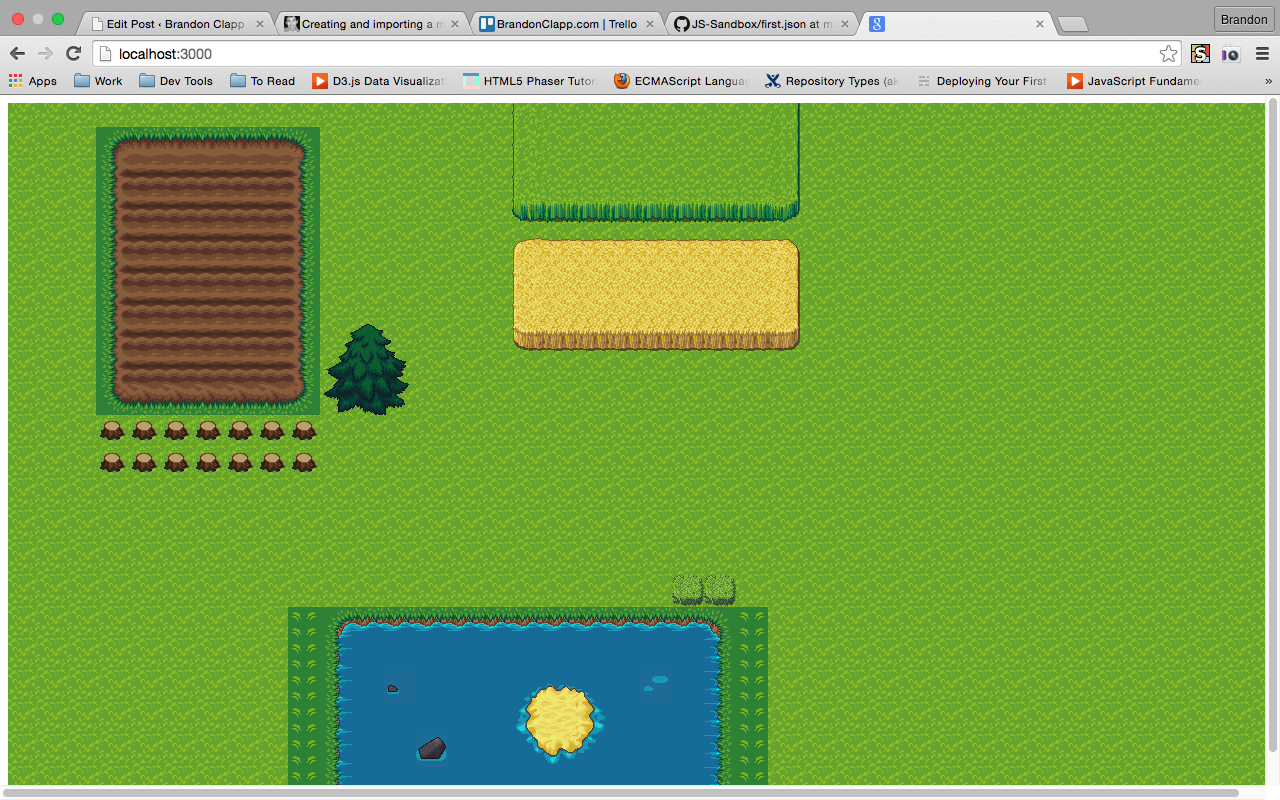
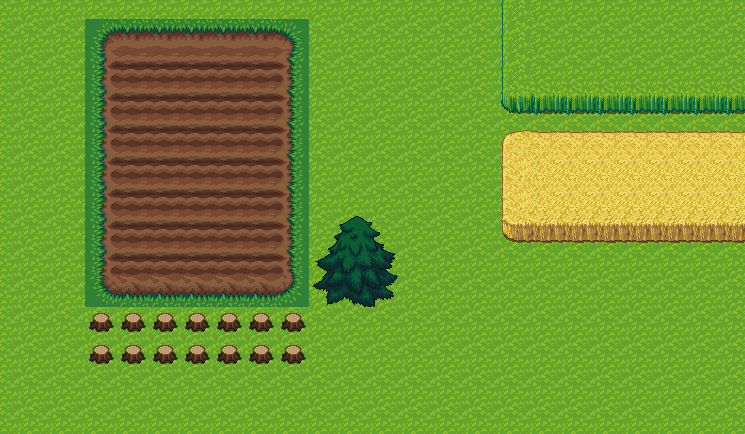
Load the game in your browser, and if all is correct then you should see your map displayed within your browser, like so.